Saturday, July 24, 2010

Window garland mini tutorial

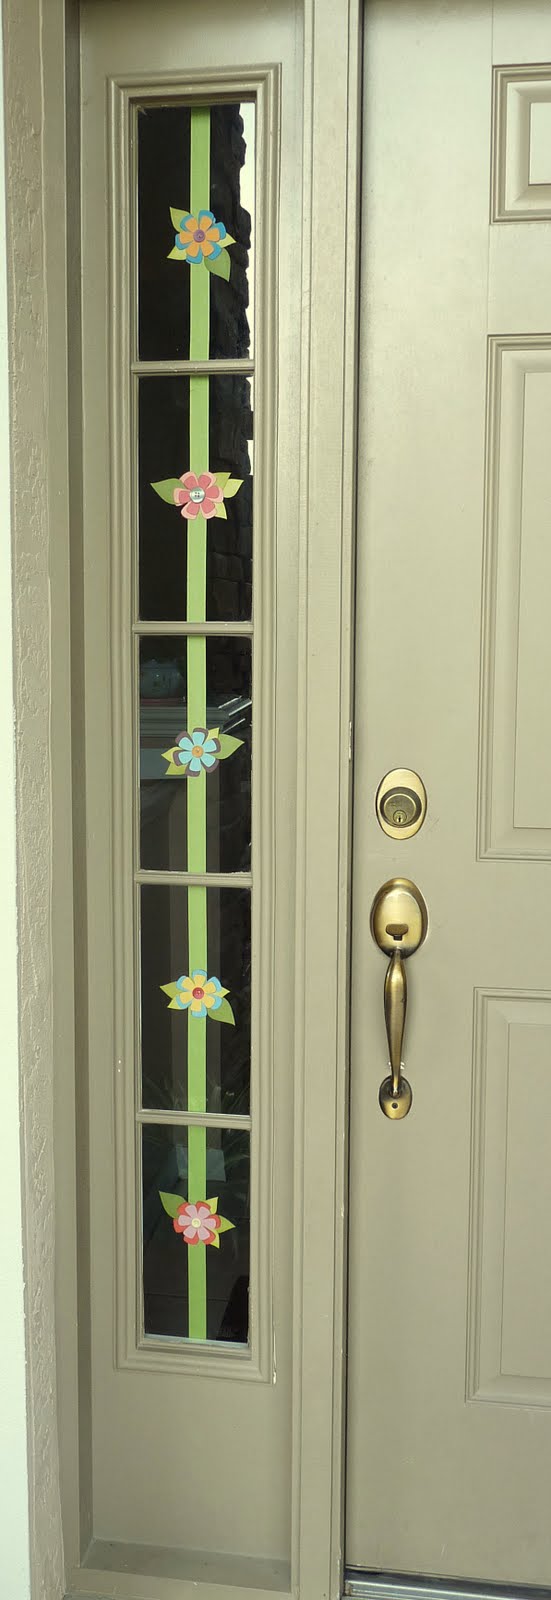
As I am trying to not buy stamps this year, I have been buying SVG files instead, LOL ;-), and also using my Cricut cartridges, like I did here since my laptop was out of commission and I couldn't access my SVG files. I made a little garland with my daughter, to decorate the vertical window panels next to my front door. It's an easy and fun way to make seasonal decorations! :-)


Supplies:
- cardstock flowers and leaves of different sizes and colors.
- ribbon (gros grain works well)
- buttons
- hot glue gun
(and ink)

Start by inking the edges of all the cut pieces. This takes a little time but gives depth.
Using the hot glue gun, attach the flowers and leaves on the ribbon, then flip your design and do the other side. This way your project will look good from inside and outside.

Finish it off with buttons in the flowers' centers.


Hang in front of the window and enjoy!... :-)
(As always, clicking on the pics will give you a larger version.)

For regular windows, I'd suggest cutting several lenghts of ribbon of different size/length and hanging them vertically in a random fashion.
I'm looking forward to making more of those with different themes like maybe Back to school, Halloween, Holidays, even birthday stuff, seasons...
As they are exposed to the sun they will fade out eventually, but they are so easy and fast to make that there should be another one ready to take its place in no time!... ;-)

[I apologize for the weird/disjointed layout but Blogger gave me a hell of a time and just didn't want to let me place my pics where I wanted... >:-(...]

Citrusy Thanks


I have been gone for so long!... I had some computer problems, my laptop crashed and the hard drive had to be replaced, but luckily we were able to retrieve my svg files and such! Phew!...

In the meantime I wasn't uploading or posting anything!... :-(
I made this card a while ago, for Catherine (http://www.thedancingpear.blogspot.com/) after winning this stamp set on her blog. :-) You might not know this but, a few months ago, I decided I wouldn't buy any stamps till the end of the year. Let's face it, I still have stamps that haven't been inked yet (shame!! but time is an issue...) and well, this little hobby of mine can be rather costly so I'm trying to be reasonnable... So it was a pleasant surprise to win some stamps... ;-)
Now this is a stamps set all about tea (created in collaboration between Catherine Doucette and Lauren Meader for My Time Made Easy), but I live in Florida and I decided to show my love for citrus and the sunshine state by using the little lemon slice and no tea themed stamp instead...

The colors on my pic are a little off, I swear it is less fluorescent in real life... ;-)

Thursday, June 17, 2010

Tickets Holder mini tutorial

I have never made a tutorial but I always enjoy seeing them on other blogs, so I thought I would take pics as I was making a little booklet to hold Naomi's tickets.
(We are starting a ticket/points system in our household to help with the concept of shores ;-) and also keep count on TV watching or wii playing.)
I thought the whole thing would be more fun with a cute little holder to keep earned tickets in! :-)

Supplies:

- strip of carstock 9 1/2" X 2 5/8"
- 3 coins envelopes no. 3 (2 1/2" X 4 1/4")
- paper trimmer/scorer
- corner rounder
- 2 magnetic strips
- 1" hole punch
- 3 tabs (I used a die by PTI to cut out mine)
- ink pad
- adhesive tape of any kind
- embellishments (& ribbon + hole punch if you wish)


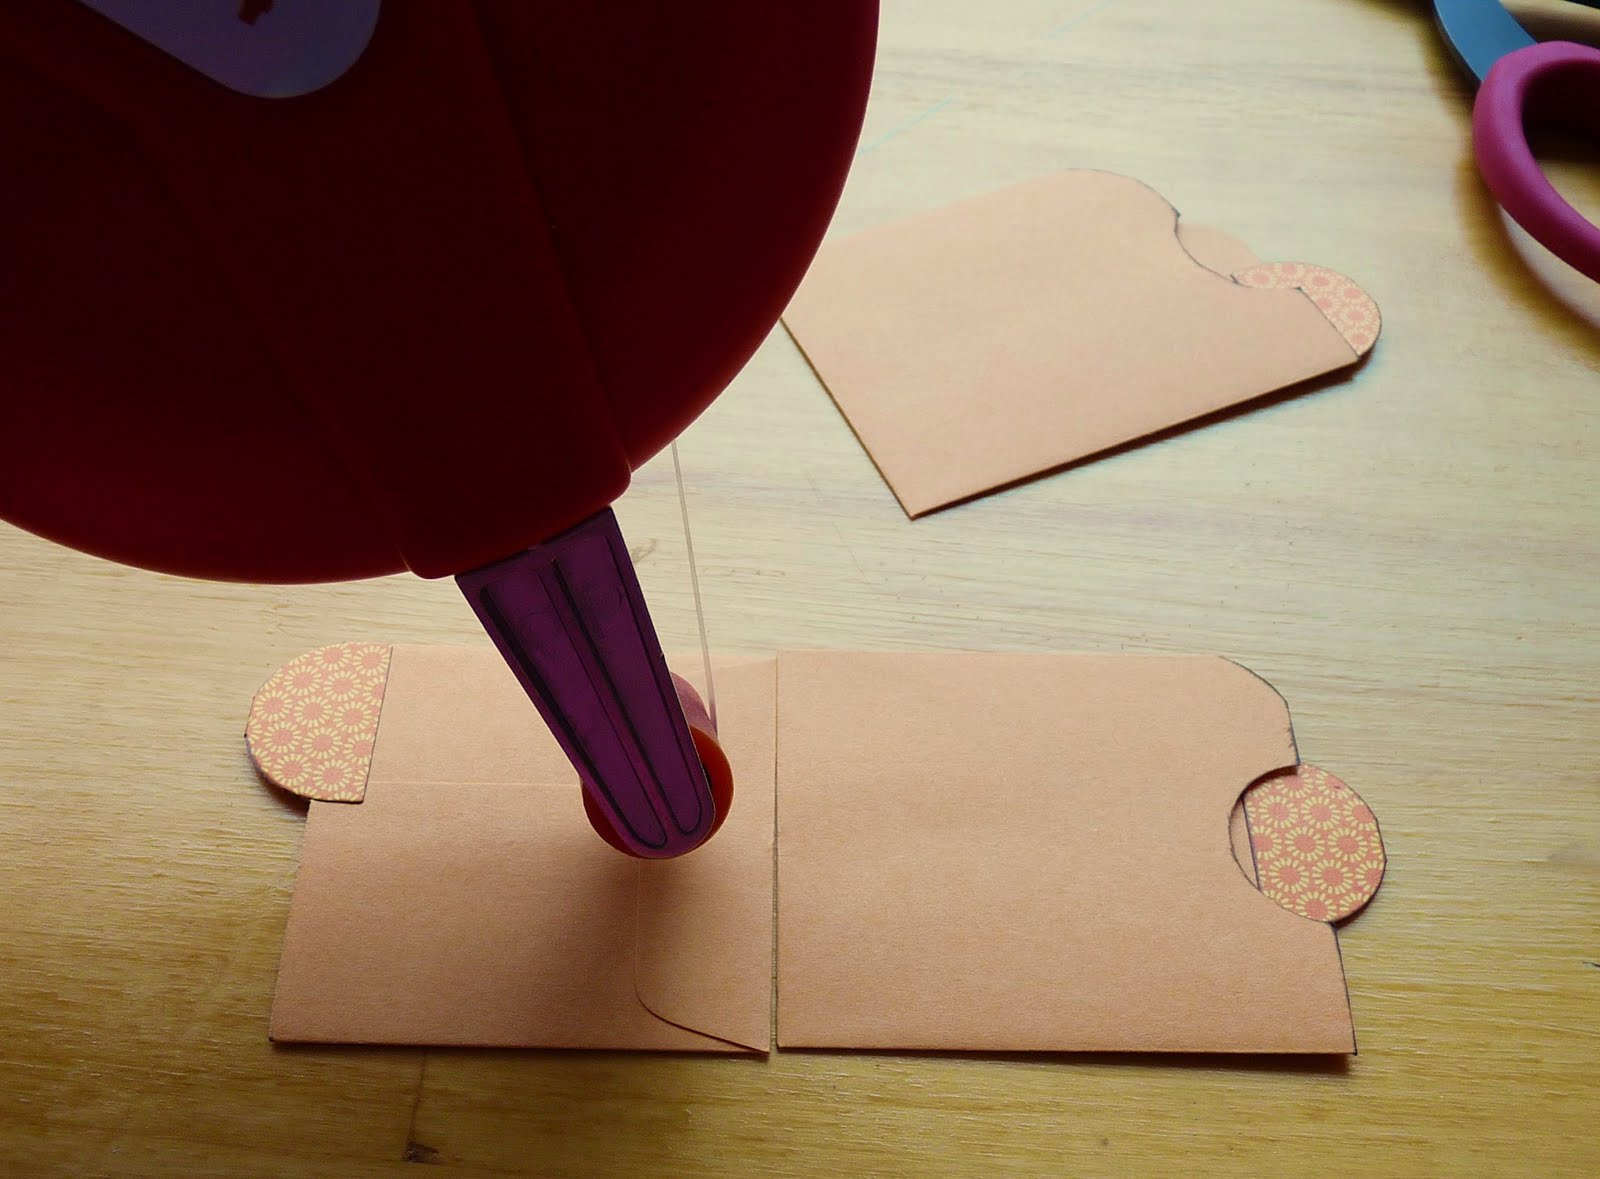
Start by cutting the envelopes' top off. The 1st one at 2 1/2, the 2nd at 2 7/8 and the 3rd at 3 2/8. Then use the 1" hole punch to make a little indentation on the front of the envelopes (for easier access to the tickets).
(Obviously this can be made to whatever size, I just left a little space between each layer. I skipped that step on the one I made for myself (see further below).)
Next add the little tabs on each pocket/envelope.

Stack the envelope on top of each other and trim the last one, then ink the edges.
That leaves you with this.
Glue the envelopes on top of each other by running 2 stripes of adhesive in the middle line of the back of each envelope and then stacking it on the next one.

Gluing only the middle part of the envelopes enables for some "accordion effect".
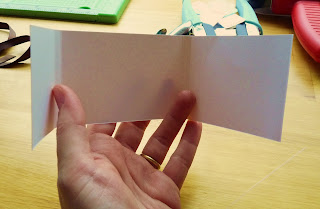

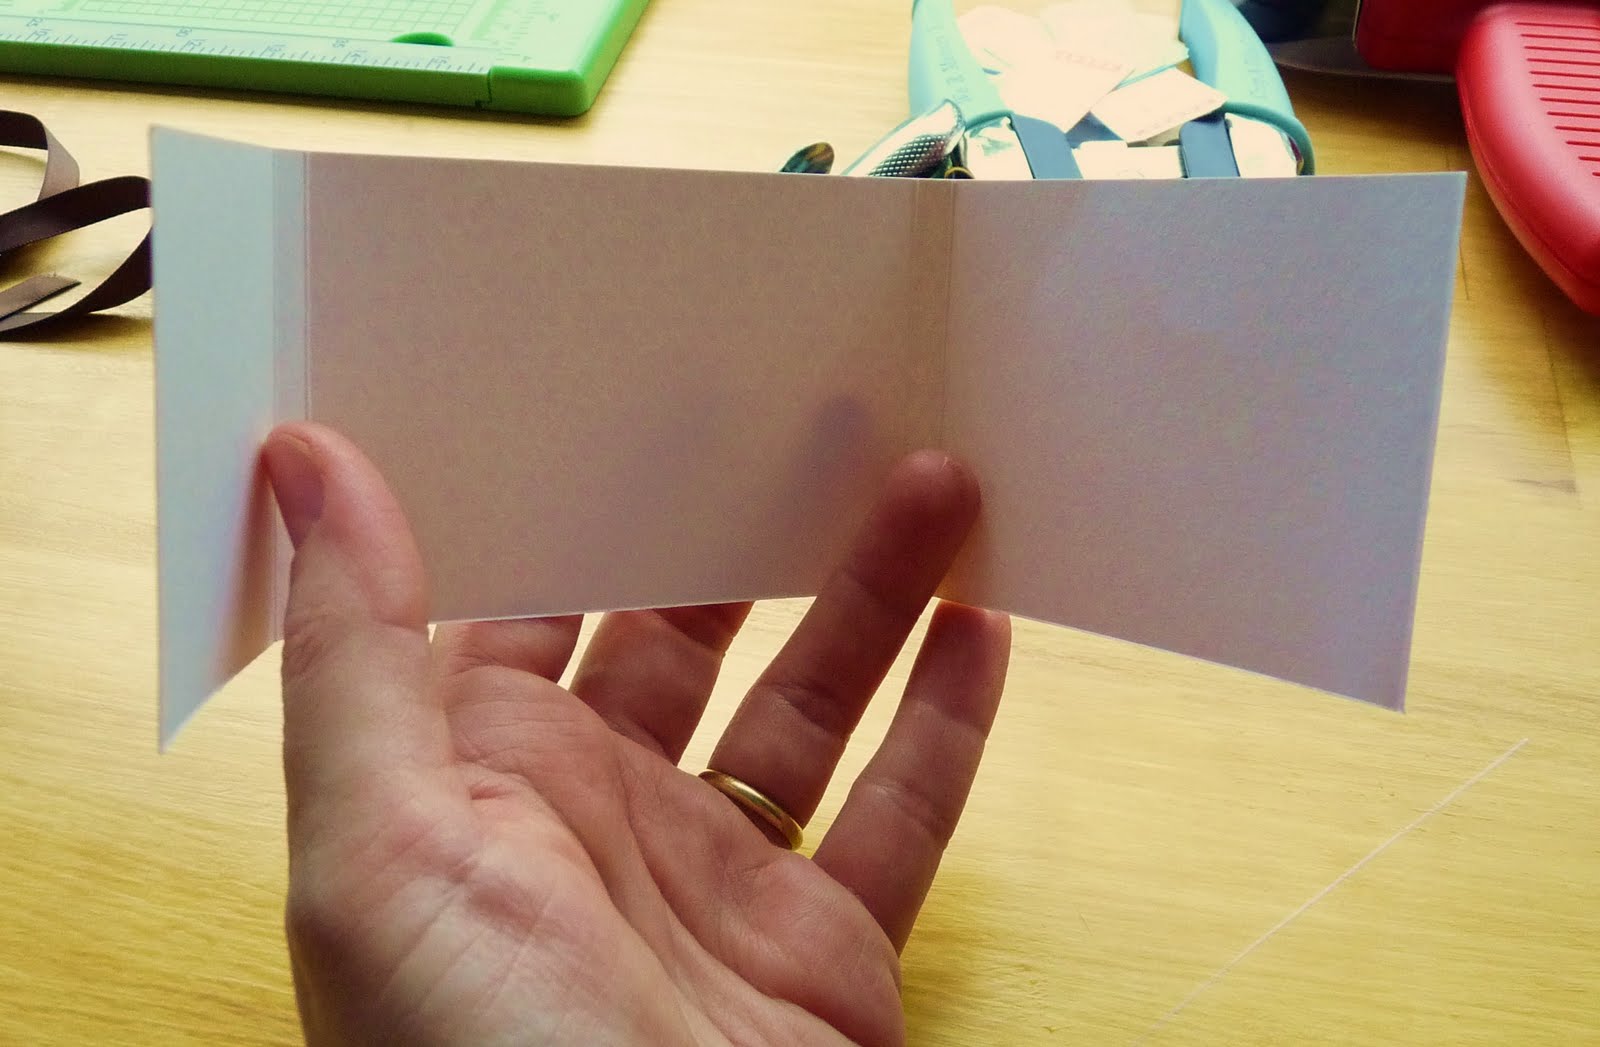
Take your cardstock strip and score at 2", 2 1/4", 6", 6 1/4". Then round the 4 corners.
Run your ink pad around the edges of the cardstock and let dry...

Glue your back envelope to the carstock.

Add the little magnetic strips facing each other. Decorate tabs if you wish.

Decorate the outside of your ticket holder.
There you have it. I don't know how to call this but let's just say a little holder for all kinds of little notes, wallet size pics and such...
Below is the one I made for myself to store the tickets I will be giving away! ;-) It's the same model, the only difference is I didn't cut "easy access half moons" and I left all the envelopes the same size... I think it looks better this way but I was looking for practicality with the 1st one... If it's gonna be handled often by a kid, they need to be able to get easily to the contents... ;-) Although the good thing it that those are so easy to make that you can just make a new one when the old one gets torn. And since the coins envelopes come in package of 250 I think I am all set for quite a while!! ;-)


I think I will make more of those to hold other little things like stamps and address labels, or the box tops I clip for the kids' schools, etc...
Well I hope my explanations were as simple as the project is. If not please let me know, I am open to constructive criticism!... ;-)
If you make your own little holders please share a link in the comment section! :-)

Sunday, June 13, 2010

Notebooks & gift-card holders


Another end of year gift. For Noah's teachers, I got Amazon giftcards, so I just needed a little packaging... ;-) I decided to make little notebooks to go with it (using PTI pads).
The fun cardstock is from DCWV. Stamps are from PTI. I'm beating myself up a bit for not inking the edges of all the pieces, it would have added some definition. But then again I was in a rush and I forgot! :-(
(Also I don't know what happened to my pics but the colors are really off, I was able to correct them only to some extent. In real life the pink heart is actually more red so it doesn't clash that much with the "notes" embossing. ;-))

Saturday, June 12, 2010

End of year teacher's gifts


I made those mini (3X3) Thank You cards sets for Naomi's teachers for the end of the school year. The room Mom was taking care of giftcards for us, but I wanted to do a little something personal on top of it. I used SVG Cuts files (Linus 3D Fall cards if I remember correctly) .
I had changed my blade just before starting that project but I'm not sure the settings on my Cricut were right because I had a little bit of trouble with the stitched design. It's wonderful that the machine does it all for you, but it still takes quite some time to cut little intricate designs like those. And since I made the envelopes too, I limited my projects to 12 cards, 6 of each design, and gave 3 apples and 3 sunflowers to each teacher. I would have loved to do 10 cards for each, but time was (again!) of the essence, and even as is, the whole project took me a few hours (granted, lately I am very slow! ;-))
It's hard to see on the pics but the open design is actually raised from the card which gives it a cool effect. (you can click on pics for a larger view).

This is the little card I made to write a little note to go with my gift (PTI stamps). I simply tied my little sets with a lenght of brown taffeta ribbon.

Then I slipped a little set with the little card, and 2 little Ghirardelli squares (at Naomi's suggestion! ;-)), in each of those little bags and that was it! :-) The little bags are also from a SVG Cuts file. It's amazing how fast and easy they come together. Love it!
I hope the teachers loved it. I had fun working on those, I just wish my brain was connecting as fast as my SCAL is!... ;-)

Tuesday, June 8, 2010

Birthday pinwheel


This is the card I made for my daughter's 9th birthday. The card was belated (oops!) but she forgave me since it allowed me to get cool new svg files for lever cards... ;-) She was quite impressed with the mechanism... :-D
I went a little overboard with buttons but hey, it's for Naomi, and it didn't have to go in an envelope... ;-)

Wednesday, May 26, 2010

For NieNie


Today I want to share a card I made for someone truly special, that I don't even know.
I discovered the existence of Stephanie Nielson, and her blog NieNie's Dialogues (http://nieniedialogues.blogspot.com/ ), shortly after her nearly fatal plane crash in August of 2008, through a prayer call on another papercrafter's blog.
Since then I followed her journey through hell and back, and let me tell you, this woman has been touched by grace. If you have a bad day and are feeling cranky about your little headache, go read about life as a Mom of 4 trying to handle everyday life while copying with constant pain and multiple reconstructive surgeries.
This all put things back into perspective, in a very sad way, but also an uplifting one. Because if she can live that life and still smile and be the woman that she is, so can we all.
Stephanie is a mormon. I am not, but I believe her life will touch you whatever your faith...
My card was inspired by a picture of her from before the accident. The whole family is outside, all dressed up for Sunday, and she is wearing this bright red lipstick that reminds me of cherries... I used (cuttlebugged) vellum cardstock to make a window so you actually see through the front of the card. The polka dots reminded me of her (and her kids') freckles... ;-)

Tuesday, May 25, 2010

"Empty" Flowers

Any papercrafter will tell you this: we don't like wasting paper! ;-) We love, use, and abuse every little piece of paper leftover... So after I cut those flowers the other day for an explosion box (with the SCAL and my Cricut), I knew I had to use their mirrored image in a way or another... ;-)
So I distressed the edges of the flowers and dots with a file (a little over the cardstock surface too) and propped that piece of cardstock on foamtape to accentuate the "empty" petals effect. For once I used the fact that this cardstock has a white core (which annoys me every time I use it for a box! ;-)) to my advantage by tearing it up. Then I just adhered some buttons, and to bring a little life in my plain design I added some Stickles here and there. This card is for my hubby's Grandma and she deserves some sparkle! :-D

Thursday, May 13, 2010

Simple gift boxes...

I feel almost ashamed to show you this project, because it so doesn't give justice to the wonderful template I used! I wish I had time to go the extra mile, use designer paper and embellishments... but time was of the essence so it had to be quick and effective... so I just used this beautiful textured cardstock from DCWV that I just adore. (It's impossible to see in the pic but the cardstock has a linen texture which is gorgeous.)
I used another SVG template for this project. This one is the Flower Box from "Tied Surprise Gift Boxes" from SVG Cuts. With 9 different templates in that file you are sure to find one that suits your needs!! I was totally blown away at how easily those came together! I didn't even have to resize anything, I just connected computer and Cricut and there you have everything that came out, isn't it amazing? Now that's what I call real time savers!...
I made those for my kids' teachers, with some Lindt Truffles inside, for teacher's appreciation week. I was a week late, but we got plagued with stomach flu and there was only so much I could do in time... ;-) I'm sure they'll appreciate the truffles nonetheless... ;-)
If your Cricut is sitting there collecting dust, and you haven't gotten the nerve to try your SCAL yet... I urge you to give this a try! Those templates came together in a cinch and I cannot wait to use them again and jazz them up next time... :-D

Thursday, April 22, 2010

SVG Blooms


This card was made using my computer, SCAL and Cricut. The SVG file is for 3D flowers (http://www.svgcuts.com/) but I made my design rather flat because it had to be mailed easily to France. The pot is one of their freebie files. :-) I had fun with it, even if it took me forever since I was playing around with the program... ;-) I really love the result and can't wait to try a much bigger size and real 3D blooms this time, like a real paper bouquet!... :-D

Wednesday, April 21, 2010

Jungle Birthdays


Still playing with Melanie's furry friends, I made those birthday cards for my twin nephew and niece. She gets the zebra, he gets the giraffe. I used giftwrapping as my background because I thought it looked so cute. The banners and added animals are on foam tape, of course... ;-)

Somebunny's birthday...


It had been too long since I last played with Melanie's little critters... So today I used her bunny to wish my 2 years old niece a happy birthday. I love this springy paper by DCWV, and cut out some of the flowers to place them in the bunny's basket, same with the little butterfly I added on the ear. Bunny is on foam tape for some added dimension.
This card makes me happy. :-D

Flowers & stripes

Simple Thank You card that gives the paper center stage.... I punched little holes in the top scallop to match the bottom one. The cool paper is by DCWV... :-)

Wednesday, March 31, 2010

Happy Birthday Noah!


This is the card I made for Noah's 7th birthday. I'll admit I was scratching my head a little when I sat down at my desk, not quite knowing what to make... Then I decided, instead of trying to figure out what would appeal to him, to go with something that made sense to me, hoping that one day we can sit down together and re-read his old cards. He doesn't seem to care much about the cards now, but maybe one day it will matter to him that he had them.
So I leafed through my new stack of DCWV Flowers Shower and found this rainbow/clouds paper.
I always say Noah is my ray of sunshine so the tag grabbed my eye right away, I just added the Happy Birthday, and the little ladybug for fun... ;-) Then I made little rays out of cardstock and added the button to create a little sun. I love rainbows (who doesn't! ;-)) and the clouds reminded me of Noah's autism... :-( The rainbow peeking out of the clouds, is my hope that he will get much much better... Finally I added little rhinestones as rain drops (the tears I shed from watching my child struggle with life) and some Stickles on the clouds just to make it more interesting for him to look at, and because autism can be quite fascinating... :-)
The last touch was a little heart button, because I love this little guy to pieces...

School projects with the Cricut


These are some projects I made for Noah's school using my Cricut "Everyday Paper Dolls" cartridge. As you can see (or can't, unless you enlarge the pic... ;-)), I had fun with details. It was very time consuming because of all the different colors and the fact that everything is laminated, then cut again by hand. I didn't take pics of the "striped characters" but the clothes come off (there's velcro between all the layers) so that the kids have to dress the character appropriately for the weather. I love it, my only concern is that even with the laminating it might not be very sturdy over time...

This one was done using the same cartridge (and I think also the "Paperdoll Dress Up"). (Again it is hard to see, but clicking on the pic will give you the giant version.) This time it is sorting worksheets. ( in the kitchen/in the bathroom, animals in my house/animals in the jungle, toys/food, in the garden/in the sea). Same problem as above, besides the time consuming aspect to choose and cut all those little pieces, even laminated I'm wondering if they will withstand being handled by kids repeatedly. A larger version would have been better but then you don't have 2 different groups on the same page...
Anyway, I got those cartridges thinking my daughter would have a blast with them, but I have to admit I love them just as much... now if I only had the time to use them! ;-)

Wednesday, March 10, 2010

Tea Box


It's my sweet neighbor Katie's birthday today, and I got her some of my favorite tea of the moment. I used the shutterfly box from MTME. Since my Cricut has been acting up I used the PDF file that you print from your computer instead and then I tweaked it a little bit by making the container shorter so that it would kind of match the height of tea bags... ;-) I was able to put 12 in there which isn't bad for something I couldn't rezize.
I decorated my box using Fanciful Flourishes and as a little wink I used the little TAZO logo that I find very cute as a little medallion on my box, (adhered with foam tape of course... ;-)) No wondering what's inside! The little tag was made with a PTI holiday set.
It is really hard to see in my pic, the leaves are actually green and I rubbed gold ink all over the edges to give it a little patina. I like messy and imperfect looks!... ;-)

Monday, March 8, 2010

Lilac Blooms


When I was about 7 years old, we moved into a big appartment (that used to be a beer brewery!) with the most magical suspended garden ever! We had a huge cherry tree (my Mom made jam every year, I remember pitting the cherries...), a japanese apple blossom tree, irises, bamboos, huge peonies, and several lilac trees (purple and white). I was very fond of this garden and wish I could show it to my kids one day, although I doubt it will ever happen... We moved to a bigger nearby city a few years later, in an appartment without a garden... :-(
Maybe it's because of this garden that lilac and peonies are my favorite flowers to this day, and that cherry and japanese apple blossom are my favorite trees... :-)

Anyway, when I saw this little flower in "Argyle Amazment" by MTME, it reminded me of the tiny flowers on a lilac bloom and I just had to try and recreate it somehow... this card was my experiment... I printed the flower in different shades of purple and with different intensity. Then I highlighted some areas with my versamark marker and embossed them with clear powder. That's what gives the glossy pink effect on the detail pic below. In real life the bloom catches the light in a very nice way. (You can see better by clicking on the pics, as this will give you giant versions)

I then embossed some more flowers and some leaves that I randomly added on pop-dots. I made the mistake of trying a branch and didn't like it but since I liked my bloom I didn't want to start over, that explains the little cluster of leaves, LOL ;-) The little rick-rack is from a Cut File called "Random ribbons", I added pearl ex on some centers, and ... voilà! :-)
I will definitely make more attempts at lilac blooms, and I think this stamp could work well for hydrangeas too (although technically I think the tiny flowers that form the big blooms might have 5 petals, but when you're an artist you are allowed some creative freedom!... ;-))

This card will go to a friend in NY with a little spring surprise. With all the snow this year I'm sure she could use a little spring flair right now... ;-)

Saturday, March 6, 2010

In the spotlight: A Creative Mint

I LOVE this blog. Such gorgeous pictures, "vignettes of colors" as Leslie calls them. If you like colors and pretty pics, this blog is for you. Burst of instant happiness guaranteed!... :-D

http://www.acreativemint.typepad.com/a_creative_mint/

Enjoy! :-)

Thursday, March 4, 2010

4 Lauren

If you read my blog regularly, you know I like Lauren Meader's work... You also know that she recently decided to start her own business and now sells stamps, digital paper and templates (http://www.mytimemadeeasy.com/).
Now I am not part of her design team, and she doesn't pay me to advertise for her, but this card is made using 4 of her products: 2 stamps set and 2 Cut Files!
That's because the card is for her, a little pat on the back for her hard work and her leap of faith for starting a business in this economy. Of course the main color is purple because it is her favorite color... ;-)

The little argyle panel was made with her stamps set "Argyle Amazement", the butterfly, flower and leaves were cut with my Cricut and SCAL using her "Flutter and Flowers" Cut file (really great in svg. file since you can resize things the way you want!) I then stamped a pattern on the butterfly with her stamps set "All a Flutter" (tons of options to make your customized butterfly....) and the little border I weaved my ribbon into is also a Cut File called "Random Ribbon"...
The "congratulations" stamp is from a My Favorite Things sentiments set (I think she'll forgive me!... ;-)) and the border punch at the bottom is from EK Success.
I hope she likes it. It must be quite a feeling, albeit a weird one, seeing something made with stamps and such that you created!! :-)

Wednesday, March 3, 2010

"Bee-day"

A birthday card for my french friend Soizick, who knows me under the nickname of Bee, so I had to use that stamp set... ;-) And the bee dictated the yellow, which dictated the ribbon... Not my colors again, but it reminds me of spring so we're all good! :-)

Button Ballons


This is my last card for "my soldier". I just found out she is going home! :-)
If you'd like to support the troops, check out http://www.soldiersangels.com/, they have lots of opportunities for volunteers. You don't have to "adopt" someone, you can also chose to send cards to random soldiers. I think I will do that next, it was harder than I had expected to write regularly to someone you don't know a thing about without getting any feedback at all! I hope the visual of the cards did make up for the beyond boring writing inside!... ;-)
Anyway, simple straightforward card. Totally out of my comfort zone though, because those are not my colors. I hate yellow so I rarely use it but I picked my colors to match the flower ribbon so... ;-)

Monday, February 22, 2010

Baby girl

Super simple baby card. Just letting the paper do all the talking... :-)
I am in LOVE with those papers' collections: Nana's nursery, baby girl (2 used here) and baby boy, from DCWV. I have used them on lots of cards, most of them not even baby cards, and they are awesome! :-D

Sunday, February 21, 2010

Baby Snail


I finally parted with the bassinet my 3 babies slept in when they were newborns!... It was time to move on... ;-) I made this card for the new baby sleeping in it... :-)
I love this sentiment from PTI. There is a lot of dimension you can't see in the pic, the snail is on foam tape, its shell is also on foam tape, and so are the button-wheels. By now you know I am a sucker for gingham... ;-)
I hope it's ok with the post office, I asked for it to be cancelled by hand...

Wednesday, February 17, 2010

Quilt

I did consider not posting this one for a second, because of my awful stitching, but I think the beauty of this craft is that things don't have to be perfect. And also that it's a learning curve and you have to be able to laugh at yourself.... My hubby is the guinea-pig recipient and I'm sure he won't mind. I hope you have a good laugh thanks to my card and that it comforts you in your abilities if you are a novice papercrafter! LOL ;-) There is always room for improvement!... ;-)
(BTW I love the card nonetheless... :-) )

Tuesday, February 16, 2010

Baby Box


I apologize for the yucky pic, but it was one of those "take the pic just as we leave" project and Noah tempered with my camera yesterday and I didn't have the time to figure out what was wrong (my wild guess is greasy little fingers all over the lense...).
So anyway I thought I'd still post it, even though I didn't get a chance for retakes, since it's my 1st ever project made with the Cricut Expression coupled with my laptop via the SCAL software. Pretty exciting, if you ask me! ;-D...
I used one of Lauren's template, that you can now purchase as an SVG file, which then allows you to resize it to your taste before having your machine cut it out for you.
You cannot see on that pic but I added extra detailing to the top using her matching cut-files. And the little onesie on the card is from the SCAL shapes library. I cut my little windows (before adhering some acetate) with a Nestability (now that was a joy since it was an afterthought, LOL) but I plan on figuring out very soon how to do that with my gadget and software!... ;-)
It took me some time because I was figuring things out as I went but I have to say it is surprisingly easy to use and really fun, and no doubt time-saving (well once you get the hang of it obviously!).
I am psyched that Lauren's templates will now be available in that format (and they still come with the pdf file so that you can choose to print them the usual way instead.)
Ain't technology grand?... (coming from one of the worst computer challenged girl...)

Monday, February 15, 2010

Dunkin Donuts Birthday...


Another yucky picture taken at night... sorry! :-S A simple multi layers birthday card for one of Noah's teachers. The class got her a Dunkin Donuts giftcard so I used their color combo as my inspiration (I just went a little lighter), and a circle medallion to evoke a donut shape, since I don't have coffee theme stamps... ;-) And just for the record, she is super skinny and just likes their coffee (which she certainly needs before a day with autistic kids)... ;-)

LinkWithin

Related Posts with Thumbnails