
- cardstock flowers and leaves of different sizes and colors.
- ribbon (gros grain works well)
- buttons
- hot glue gun
(and ink)
 Start by inking the edges of all the cut pieces. This takes a little time but gives depth.
Using the hot glue gun, attach the flowers and leaves on the ribbon, then flip your design and do the other side. This way your project will look good from inside and outside.
 Finish it off with buttons in the flowers' centers.
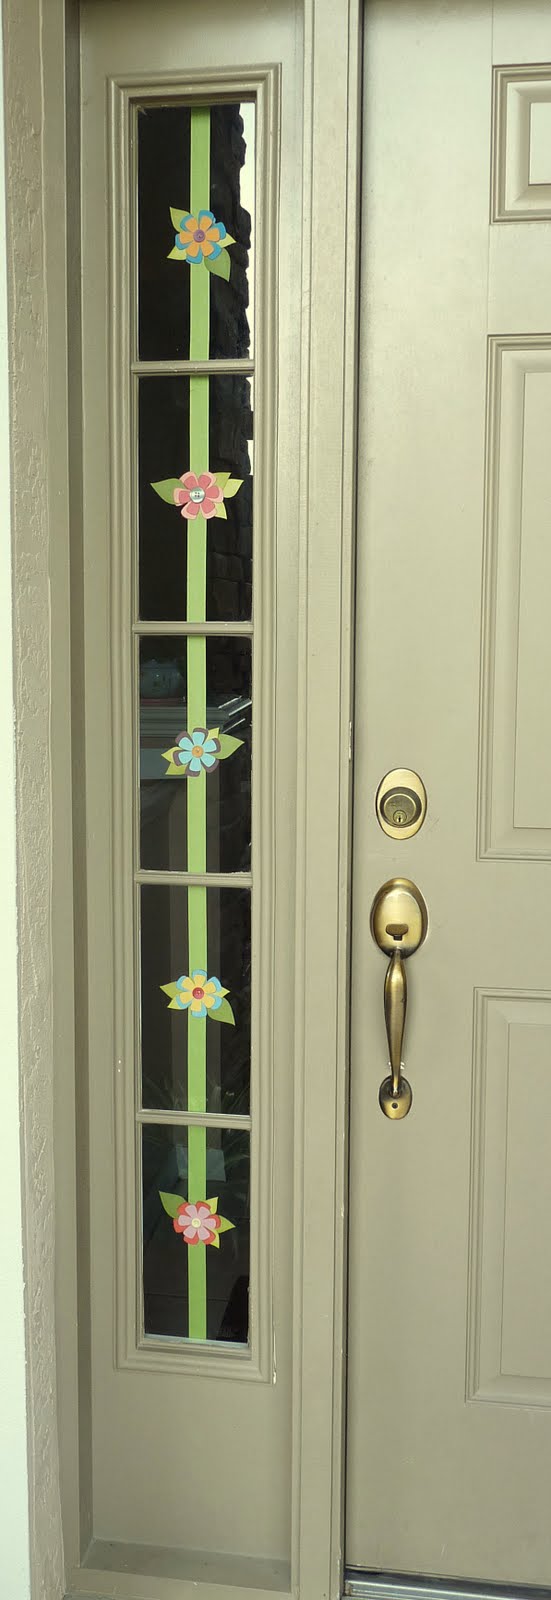
Hang in front of the window and enjoy!... :-)
(As always, clicking on the pics will give you a larger version.)
For regular windows, I'd suggest cutting several lenghts of ribbon of different size/length and hanging them vertically in a random fashion.
I'm looking forward to making more of those with different themes like maybe Back to school, Halloween, Holidays, even birthday stuff, seasons...
As they are exposed to the sun they will fade out eventually, but they are so easy and fast to make that there should be another one ready to take its place in no time!... ;-)
[I apologize for the weird/disjointed layout but Blogger gave me a hell of a time and just didn't want to let me place my pics where I wanted... >:-(...]
2 comments:
I just love that idea Bee...It really does look easy and fun. I wonder if I could do it with monsters and robots too?
Bee
This is such a great idea. Love it.
Myrna
Post a Comment